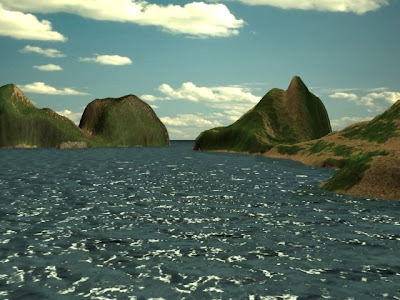
The first part of the post production composition will be looking at adding water to a scene, now 3D Studio Max comes with an in-built water material in its material libraries and this is what was used to create the water on the scene below. A displacement map was used just to lift the surface and create its uneven pattern. An opacity map has also been used but has been kept to a minimum, this can be seen to the right of the image where the water meets the land and a small darkened tint in the water can be seen which gives the water a shallow look here.

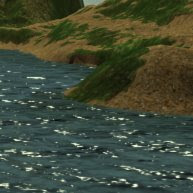
 To allow a fair experiment to be issued the image had to be re rendered to not show the displaced water surface, instead the objects properties were stripped back to its original plane showing its original colour. This method will allow the post rendering Photoshop water to have the same colour properties and the only alteration will be the final output of the displaced water. Below is the render that is ready for use.
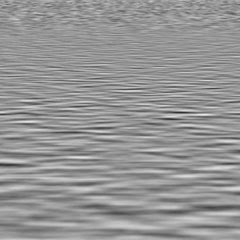
 To create the distortions and reflection of the surrounding that will make the water look like liquid a displacement map must be created and this will coincide with the distortion setting on Photoshop. To the right is the displacement map created for this purpose.This map will ‘shift pixels’ in an image according to the brightness values of the map. For example the lighter areas will shift these pixels more than the darker areas causing a depth effect in the image.However in Photoshop the channels area is very important as the first two channels are used to calculate the horizontal and vertical shifts of displacement. This advantage can be had by stretching one of the channels and leaving the other as the normal to create a random uneven look to the water.
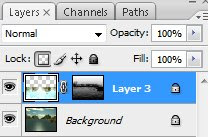
 To create the water effect and the reflection of the islands the area above the blue plane that was not the water section was copied and then inverted vertically and a quick mask was issued on the same layer, this would allow the displacement map to filter through the layer and use the colour of the planethat was created in 3DS Max which in turn will have the same colour properties to allow for proper assessment.
 The key factors when using displacement in Photoshop is that it the amount that is produced depends on the initial map – both the amount of brightness issued and also the amount of distance between the first and second channels. Another factor is that there is an addition height and width instruction that enables a user to force the displacement map to stretch the layer that it has been placed on.
The amount of displacement was double from the previous image and had an undesirable effect, the white parts of the displacement have been overwhelmed and the water now appears to have distinct areas that do not look effective or realistic. However the white areas does give the water area more depth much like how the water looks in the rendered image from 3DS Max.
 Changing the amount of white light to filter through to the water was amended in the levels area of Photoshop, by selecting the white input levels and slowly moving them down the scale to the black levels the water can then be issued with the amount of light that falls onto the displacement map thus allowing the waves to have a various range and finally giving the water more depth.
After showing the images to a section of the population around twenty subjects, just over half of the votes leaned towards the initial rendered from Max and likewise I feel the same way, the waves look more realistic such as the waves you would see on the ocean or at a beach. The conclusion for this experiment is that the 3DS Max water material has the benefit of looking more realistic and the control of the amount of displacement is more beneficial and far quicker to a user than creating on Photoshop. The time taken to generate and render the water was far quicker than the post production method.

